微前端改造
这里以Vue3为例子,主应用和子应用均使用vue3
路由的话,建议主应用和子应用使用相同模式,即均为history或者均为hash
以下先使用为history模式讲解,最后会写如何使用hash模式。
History模式
主应用改造
一般情况下,我们会将带导航的layout的部分,直接放在主应用中。当然不是说不能拆,是能拆的,因为导航的layout明显是个路由不敏感部分,完全可以拆解为单独的子应用。
1.添加qiankun
2.vue.config.js
其实没什么要改的,但我这还是建议把这两个加上
1
2
3
4
5
6
| module.exports = {
publicPath: '/main/',
outputDir: 'main',
};
|
3.router.js
1
2
3
4
5
6
| const router = createRouter({
history: createWebHistory(process.env.BASE_URL),
routes,
});
export default router;
|
4.加载微应用的改造,可以在src下建一个micro目录
1
2
3
| |----index.js //注册
|----store.js //应用间通信
|----subapps.js //配置信息
|
4.1 index.js
1
2
3
4
5
6
7
8
9
10
11
12
13
14
15
16
17
18
19
20
21
22
23
24
| import { registerMicroApps } from 'qiankun';
import subapps from './subapps';
function register() {
registerMicroApps(subapps, {
beforeLoad: (app) => console.log('before load', app.name),
beforeMount: [
(app) => console.log('before mount', app.name),
],
afterMount: [
(app) => console.log('before mount', app.name),
],
beforeUnmount: [
(app) => console.log('before mount', app.name),
],
afterUnmount: [
(app) => console.log('before mount', app.name),
],
});
}
export default register;
|
4.2 store.js
应用间通信,qiankun提供了一个简单的apiinitGlobalState
但是这玩意不是“响应式”的,换句话说,它改变不会引起页面变化。
得益于vue3提供的reactive,我们可以很方便的构造一个响应式。
(同时也因为非常方便,所以也有很多大佬喊出了不再需要vuex,建议搜搜看,很有意思,当然这是题外话。)
并将这个响应式用于页面展示。
1
2
3
4
5
6
7
8
9
10
11
12
13
14
15
16
17
18
19
20
21
22
23
24
25
26
27
28
29
30
31
32
33
34
35
36
37
38
39
40
|
import { initGlobalState } from 'qiankun';
import { reactive } from 'vue';
const initialState = reactive({
token: '123',
});
const actions = initGlobalState(initialState);
actions.onGlobalStateChange((newState, oldState) => {
console.log('主应用监听', '变化前', oldState, '变化后', newState);
Object.keys(newState).forEach((key) => {
initialState[key] = newState[key];
});
}, true);
function getGlobalState(key) {
return key ? initialState[key] : initialState;
}
function setGlobalState(globalState) {
actions.setGlobalState(globalState);
}
function offGlobalStateChange() {
actions.offGlobalStateChange();
}
export default {
actions,
getGlobalState,
setGlobalState,
offGlobalStateChange,
};
|
4.2 subapps.js
1
2
3
4
5
6
7
8
9
10
11
12
13
14
15
16
17
18
19
20
21
22
23
24
25
26
27
28
29
| import router from '@/router/index';
const baseUrl = process.env.BASE_URL;
const subapps = [
{
name: 'sub-login',
entry: process.env.VUE_APP_SUB_LOGIN,
container: '#sub-apps',
activeRule: `${baseUrl}sub-login`,
props: {
routeBasePath: '/sub-login',
mainRouter: router,
},
},
{
name: 'sub-user-manage',
entry: process.env.VUE_APP_SUB_USER_MANAGE,
container: '#sub-apps',
activeRule: `${baseUrl}sub-user-manage`,
props: {
routeBasePath: '/sub-user-manage',
mainRouter: router,
},
},
];
export default subapps;
|
name,entry,container,activeRule
在第上一篇已经介绍过了
这里多了一个props,props意思是给子应用获取的对象,意味着有些东西,可以从主应用往下传递给子应用。这里我传递了两个值
1
2
3
| routeBasePath:子应用的路由地址前缀,在history模式下用于填写子应用的basepath,非常有用
mainRouter:主应用的router,在history模式下应用间跳转非常有用
|
这个东西我们还可以做点有意思的操作,比如:无星的微前端之旅(四)——qiankun线上服务代理到本地
5.提供挂载节点#sub-apps
我们在路由定义中,把所有子应用的components都匹配到一个View中。
这个没什么写代码的意义,截个图直接掠过。
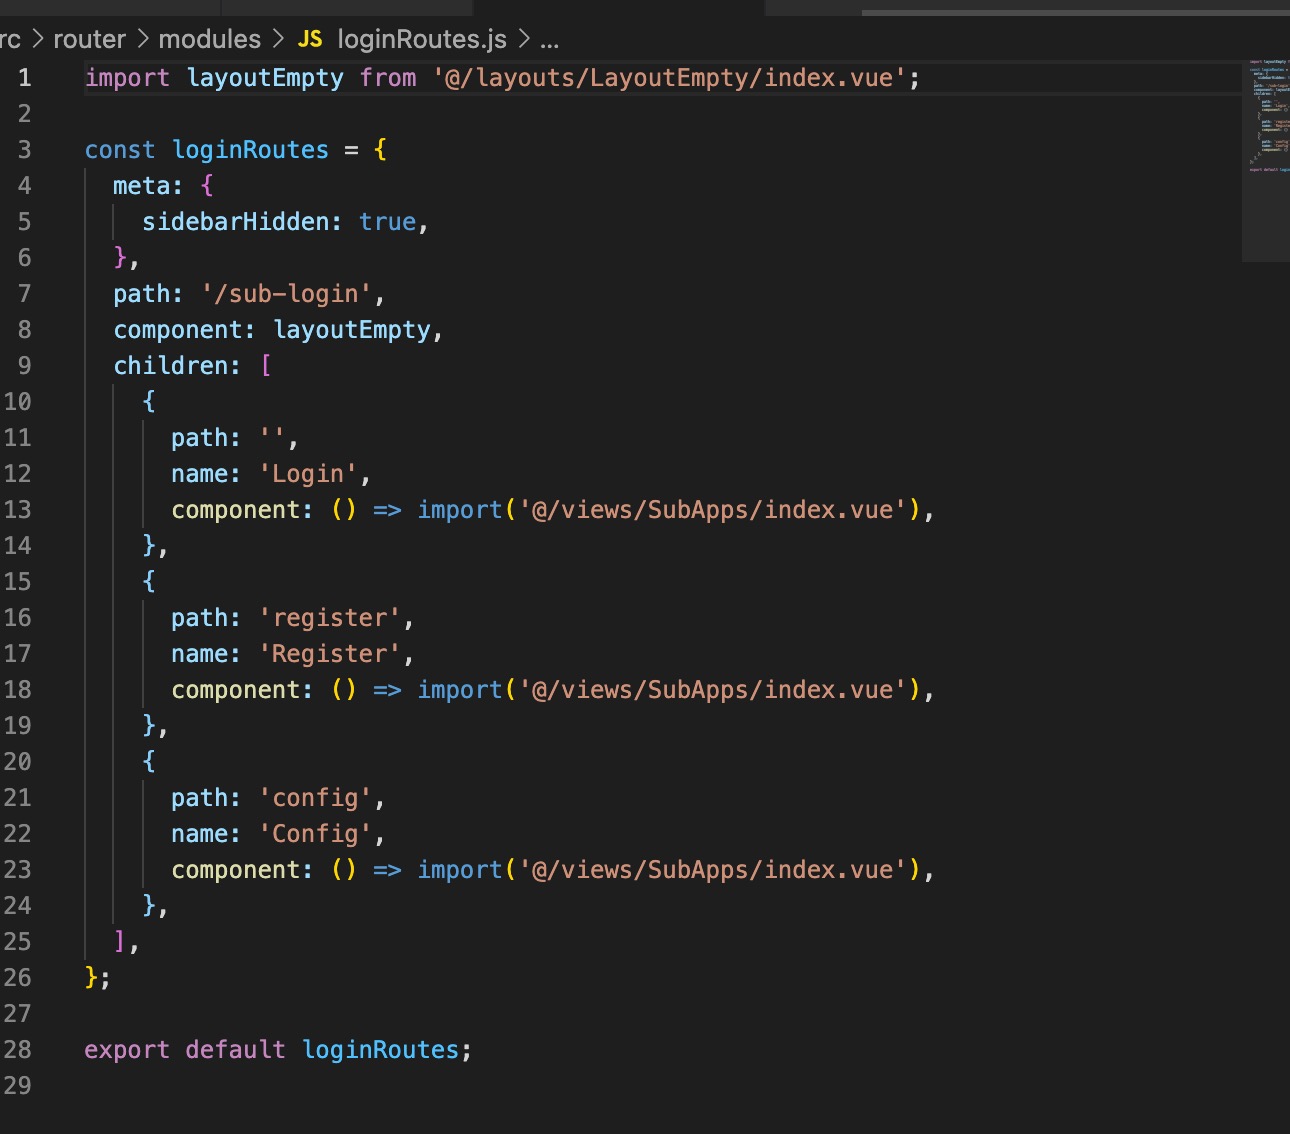
这个view提供一个dom节点用于后续挂载和启动
1
2
3
4
5
6
7
8
9
10
11
12
13
14
15
16
17
18
19
20
21
22
23
24
25
26
27
28
29
30
31
32
33
34
35
36
37
38
39
40
41
| <template>
<div id="sub-apps" />
</template>
<script>
import Actions from '@/micro/store';
import {
defineComponent, onMounted, onUnmounted,
} from 'vue';
import { start } from 'qiankun';
export default defineComponent({
name: 'SubApps',
setup() {
onMounted(async () => {
console.log('Subapps页面加载');
if (!window.qiankunStarted) {
window.qiankunStarted = true;
start();
}
});
onUnmounted(() => {
if (window.qiankunStarted) {
window.qiankunStarted = false;
Actions.offGlobalStateChange();
}
});
return {
};
},
});
</script>
<style lang="less">
#sub-apps {
height: 100%;
>div:first-child {
height: 100%;
}
}
</style>
|
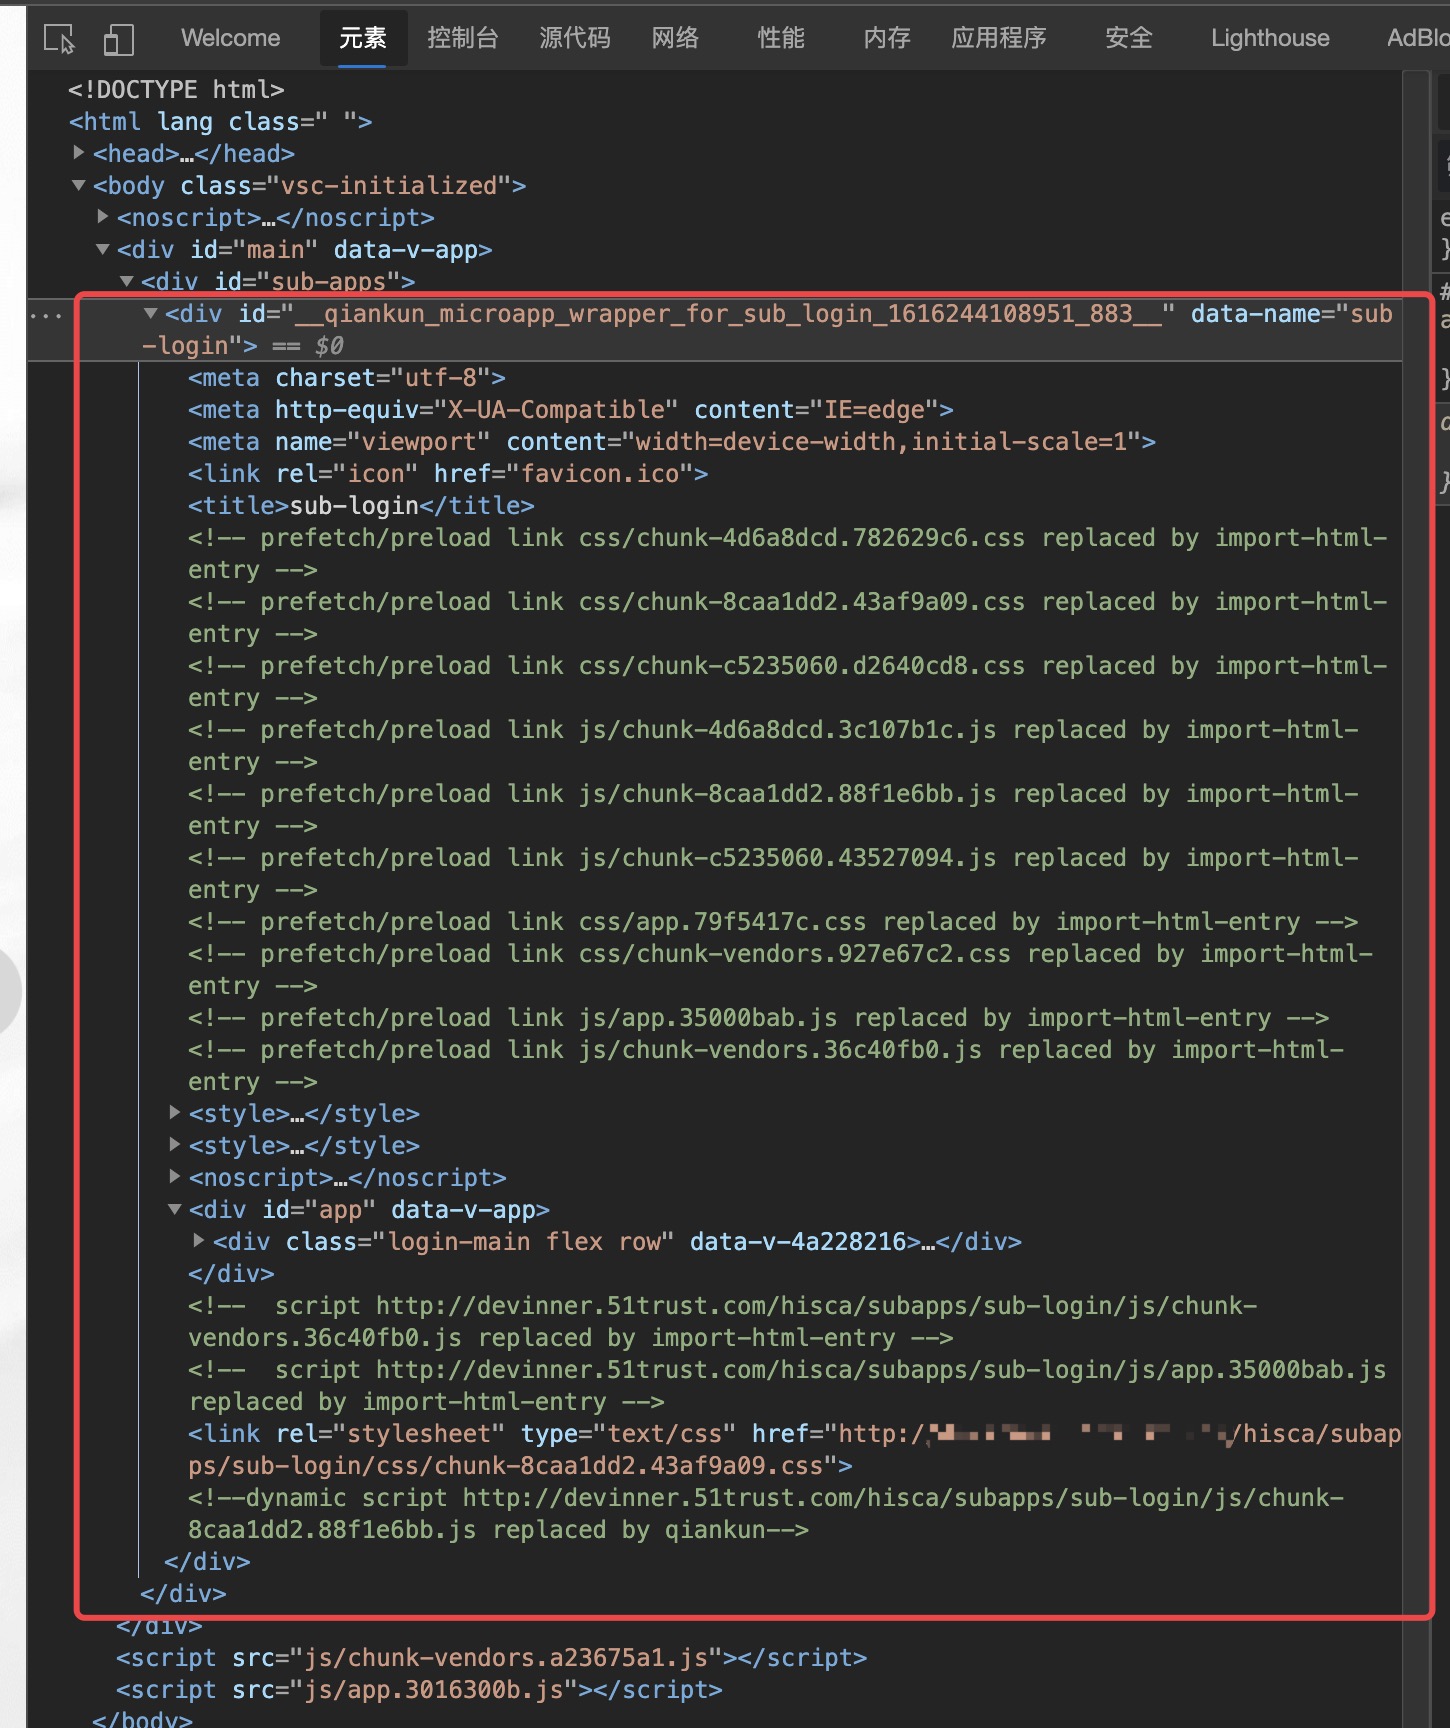
如何在主应用的某个路由页面加载微应用
这里有一个需要注意的点。不是js代码,而是css。
主应用加载子应用的时候,会新增一个qiankun的div盒子,可能这个盒子会影响样式,导致撑不开。所以需要使用css选择器让qiankun注入的盒子加一些css进行改变以达到预期效果。
6.main.js修改
改造前:
1
2
3
4
5
6
7
8
|
import { createApp } from 'vue';
import App from './App.vue';
import router from './router';
import store from './store';
createApp(App).use(store).use(router).mount('#app');
|
改造后:
1
2
3
4
5
6
7
8
9
10
11
12
| import { createApp } from 'vue';
import App from './App.vue';
import router from './router';
import store from './store';
import register from './micro/index';
import '@/micro/store';
createApp(App).use(store).use(router).mount('#app');
register();
|
到此为止,主应用改造完毕。
子应用改造
1.vue.config.js添加核心配置
1
2
3
4
5
6
7
8
9
10
11
12
13
14
15
16
17
18
19
20
21
22
23
24
25
26
| const packageName = require('./package.json').name;
module.exports = {
publicPath: '/',
outputDir: packageName,
configureWebpack: {
output: {
library: `${packageName}-[name]`,
libraryTarget: 'umd',
jsonpFunction: `webpackJsonp_${packageName}`,
},
},
devServer: {
open: true,
port: 3001,
headers: {
'Access-Control-Allow-Origin': '*',
},
},
};
|
1
2
3
| if (window.__POWERED_BY_QIANKUN__) {
__webpack_public_path__ = window.__INJECTED_PUBLIC_PATH_BY_QIANKUN__;
}
|
它的作用,点击标题查看文档
3.src文件夹下新建一个micro/store.js,用于应用间通信相关
1
2
3
4
5
6
7
8
9
10
11
12
13
14
15
16
17
18
19
20
21
22
23
24
25
26
27
28
29
30
31
32
33
34
35
36
37
38
39
40
41
42
43
44
|
import { reactive } from 'vue';
let actions = null;
const initialState = reactive({});
let routeBasePath = '';
function setActions(tmpActions) {
actions = tmpActions;
actions.onGlobalStateChange((newState, oldState) => {
console.log('子应用监听', '变化前', oldState, '变化后', newState);
Object.keys(newState).forEach((key) => {
initialState[key] = newState[key];
});
}, true);
}
function setGlobalState(state) {
return actions.setGlobalState(state);
}
function getActions() {
return actions;
}
function getGlobalState(key) {
return key ? initialState[key] : initialState;
}
function setRouteBasePath(path) {
routeBasePath = path;
}
function getRouteBasePath() {
return routeBasePath;
}
export default {
setActions,
getActions,
setGlobalState,
getGlobalState,
setRouteBasePath,
getRouteBasePath,
};
|
4.router改造
1
2
3
4
5
6
7
8
9
10
11
12
13
14
15
16
17
18
19
20
21
22
23
24
25
26
27
28
| import { createRouter, createWebHistory } from 'vue-router';
import Actions from '@/micro/store';
const routes = [
{
path: '/',
name: 'Login',
component: () => import('../views/Login/index.vue'),
},
{
path: '/register',
name: 'Register',
component: () => import('../views/Register/index.vue'),
},
{
path: '/config',
name: 'Config',
component: () => import('../views/Config/index.vue'),
},
];
const setupRouter = () => createRouter({
history: createWebHistory(Actions.getRouteBasePath()),
routes,
});
export default setupRouter;
|
5.main.js改造
改造前:
1
2
3
4
5
6
7
8
|
import { createApp } from 'vue';
import App from './App.vue';
import router from './router';
import store from './store';
createApp(App).use(store).use(router).mount('#app');
|
改造后:
1
2
3
4
5
6
7
8
9
10
11
12
13
14
15
16
17
18
19
20
21
22
23
24
25
26
27
28
29
30
31
32
33
34
35
36
37
38
39
40
41
42
43
44
45
46
47
48
49
|
import './public-path';
import { createApp } from 'vue';
import Actions from '@/micro/store';
import App from './App.vue';
import store from './store';
import setupRouter from './router';
let instance = null;
let router = null;
function render(props = {}) {
const { container, routeBasePath, mainRouter } = props;
Actions.setRouteBasePath(routeBasePath || process.env.BASE_URL);
router = setupRouter();
instance = createApp(App);
instance.use(router);
instance.use(store);
router.isReady().then(() => {
instance.mount(container ? container.querySelector('#app') : '#app');
});
}
if (!window.__POWERED_BY_QIANKUN__) {
render();
}
export async function bootstrap() {
console.log('%c ', 'color: green;', 'vue3.0 app bootstraped');
}
export async function mount(props) {
Actions.setActions(props);
render(props);
}
export async function unmount() {
instance.unmount();
instance._container.innerHTML = '';
instance = null;
router = null;
}
|
好了,子应用到此就改造完毕了。
Hash
如果是hash模式,那么需要变动的地方就比较多了
1.主应用和子应用中vue.config.js全部修改为
1
2
3
| module.exports = {
publicPath: './',
}
|
2.主应用和子应用中router修改为
1
2
3
4
5
|
const setupRouter = () => createRouter({
  history: createWebHashHistory(),
  routes,
});
|
3.主应用subapps.js修改为
1
2
3
4
5
6
7
8
9
10
11
12
13
14
15
16
17
18
19
20
21
22
23
24
25
26
27
28
29
| import router from '@/router/index';
const baseUrl = '#/';
const getActiveRule = (hash) => (location) => location.hash.startsWith(hash);
const subapps = [
{
name: 'sub-login',
entry: process.env.VUE_APP_SUB_LOGIN,
container: '#sub-apps',
activeRule: getActiveRule(`${baseUrl}sub-login`),
props: {
routeBasePath: '/sub-login',
mainRouter: router,
},
},
{
name: 'sub-user-manage',
entry: process.env.VUE_APP_SUB_USER_MANAGE,
container: '#sub-apps',
activeRule: getActiveRule(`${baseUrl}sub-login`),
props: {
routeBasePath: '/sub-user-manage',
mainRouter: router,
},
},
];
export default subapps;
|
修改完毕。
至此,主应用和子应用均修改完毕。